Set Up Your Scheduled Blast Message
Learn how to schedule and send bulk messages to your contacts at exactly the right time — promotions, reminders, follow-ups, and announcements, all automated in advance.
How to Set Up a Scheduled Broadcast — Step by Step
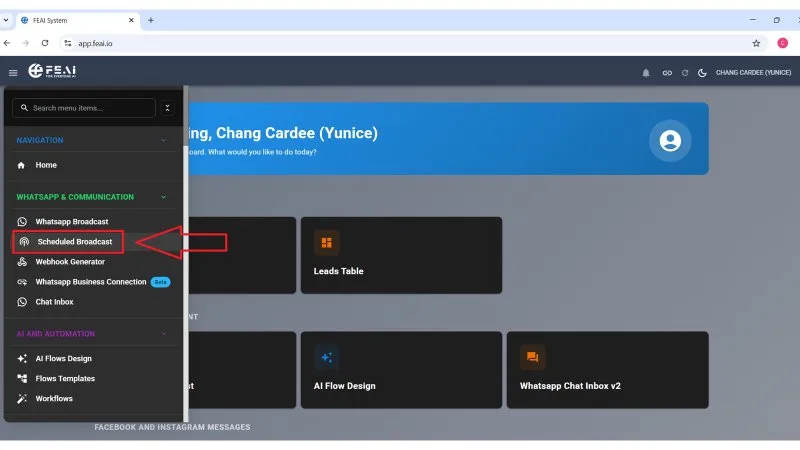
Go to Scheduled Broadcast
From the left sidebar, click on WhatsApp & Communication → Scheduled Broadcast. This opens the Blast Campaigns page where all your broadcast campaigns are managed.
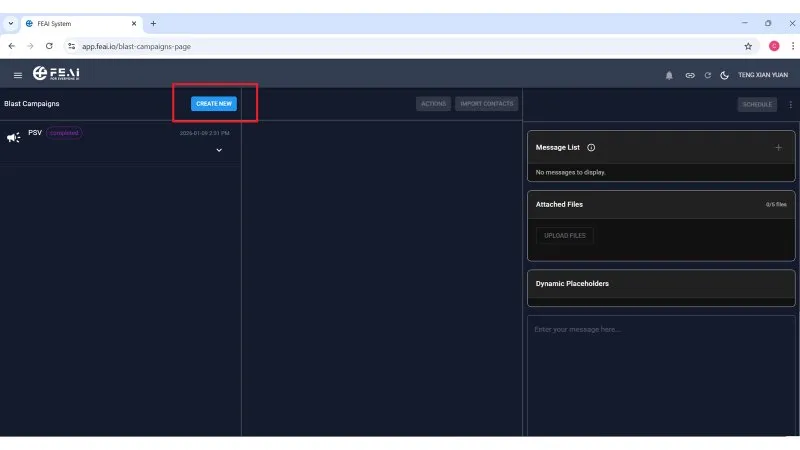
Click "Create New" to start a campaign
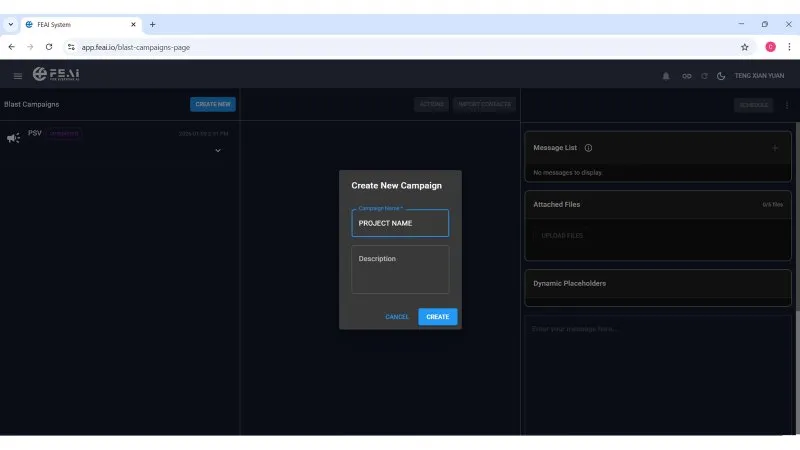
On the Blast Campaigns page, click the CREATE NEW button at the top. A popup will appear asking you to enter a Campaign Name and an optional description. Name it something recognisable — for example, the project or product you are promoting. Then click CREATE.
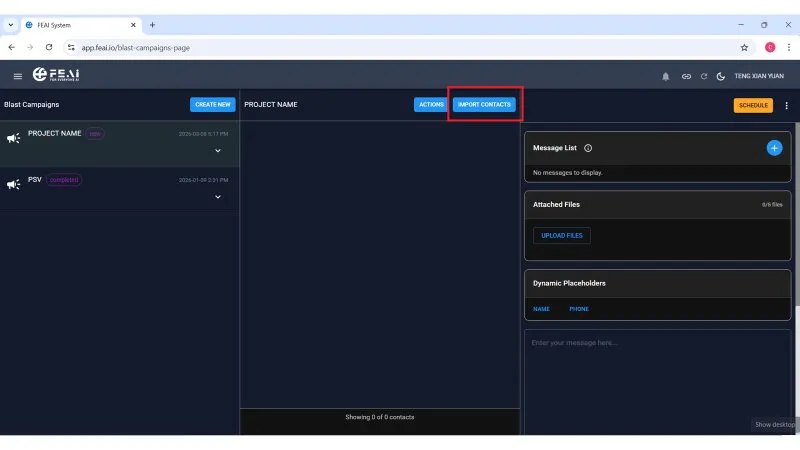
Import your contact list
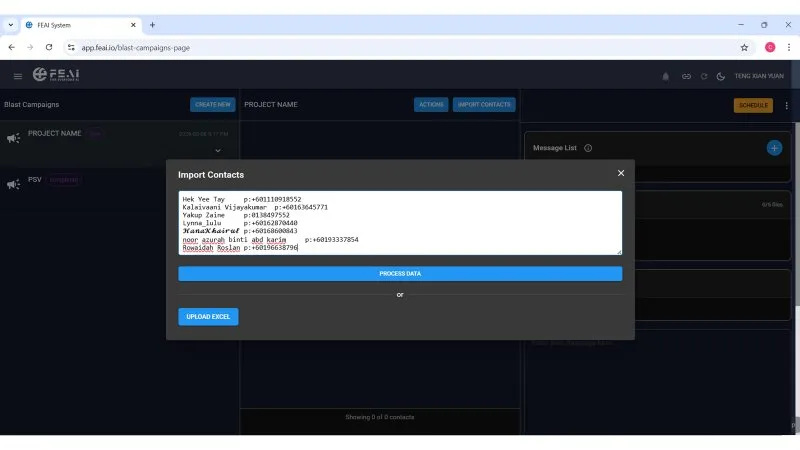
Once your campaign is created, click the IMPORT CONTACTS button at the top. An import window will appear. You have two ways to add contacts:
- Paste contact list directly — type or paste names and phone numbers in the format shown (Name + phone number), then click PROCESS DATA
- Upload Excel file — click UPLOAD EXCEL to import a spreadsheet of contacts
Once processed, your contacts will appear in the campaign list showing name, phone number, status, and scheduled time.
Create your message template
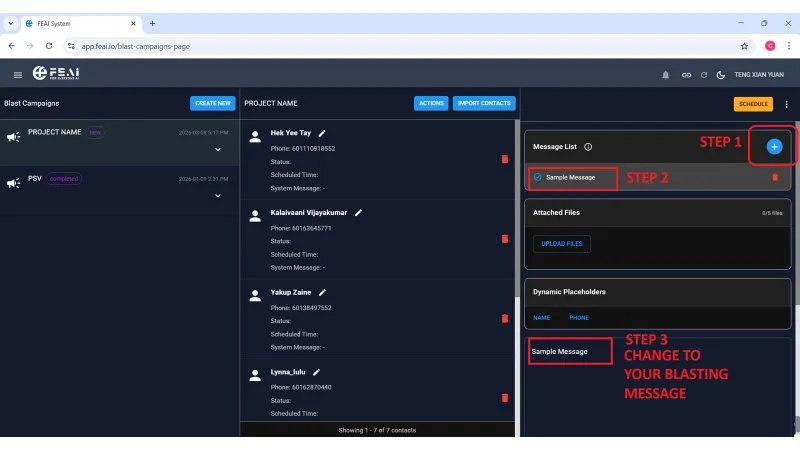
On the right side panel, you will see the Message List section. Click the + blue button (Step 1) to add a new message. A "Sample Message" template will appear (Step 2) — click on it and change the text to your actual blast message (Step 3).
- You can create multiple message templates in one campaign
- Use Attached Files to upload images, videos, or documents to send along with your message
-
Use the Dynamic Placeholders — click NAME or PHONE to automatically personalise the message with the customer's name or phone number. For example: "Hi {name}, we have exciting news for you!" — FEAI will replace
{name}with each customer's actual name when sending
Click Schedule to send
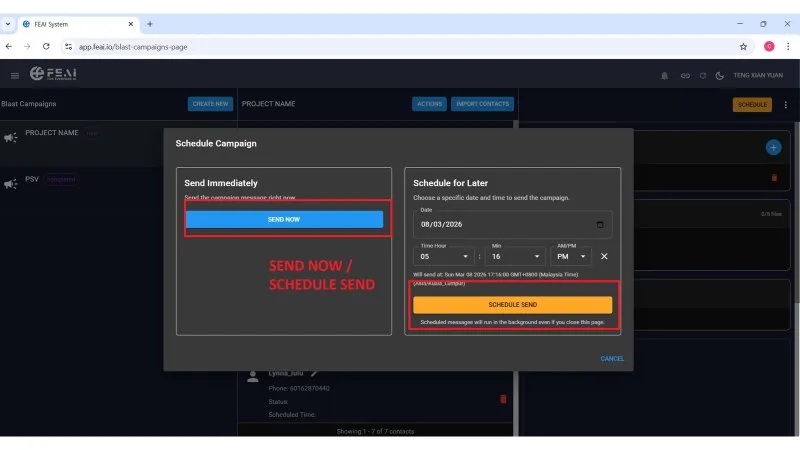
Once your contacts are imported and your message is ready, click the orange SCHEDULE button at the top right. A popup will appear with two options:
- Send Now — click SEND NOW to blast the message to all contacts immediately
- Schedule for Later — choose a specific date and time to send, then click SCHEDULE SEND. FEAI will send automatically at that time — even if you are offline or have closed the page

Restart campaign for a new contact list
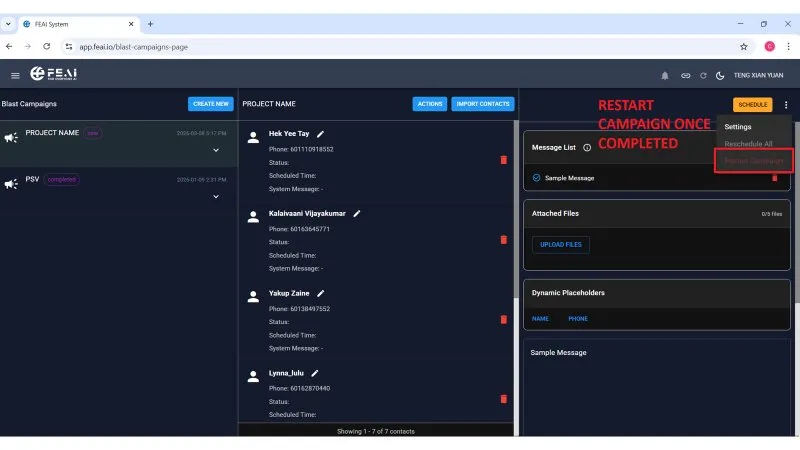
Once your campaign is completed, you can reuse the same campaign for a new batch of contacts. Click the three-dot menu (⋮) at the top right of your campaign, then click Restart Campaign.
- After restarting, import your new contact list
- Old contacts that have already been sent to can be deleted to keep your list clean
- This saves you from creating a new campaign every time — just restart and reuse
💡 Pro Tip for FEAI Members: Combine Scheduled Broadcast with your AI Agent flow. Send a broadcast blast → when the customer replies, your AI Agent automatically takes over and continues the conversation. This creates a fully automated lead nurturing system that works around the clock.